How Do I Set up Cleats?
The first time I bought a pair of clip in shoes, I didn’t even think about how they were set up. I was in Bleach Sports in Bourg d’Oisans, the beautiful town at the bottom of Alpe d’Huez that I used to call home. I was more concerned about how the heck I was going to clip in and out of these without falling sideways off my bike than learning about the small differences in position available. Fast forward a year and I was still riding with the cleats in the same position that Will had put them in when I bought the shoes.
To set up your cleats correctly, the first thing to do is check that your shoes fit. If you are wearing shoes that are too big, your cleats will be further forward towards the toe and you may not be able to get them into the correct range. A mistake people with wide feet make is to go for longer shoes to increase the overall volume. Lake and Fizik both have a range of shoes offered in a wide fitting. In the other direction, shoes which are too small will be liable to toe numbness, but the cleats could be pushed back too far. I bought shoes that fit me, but I didn’t know I’d have to replace them after having two children. One of the pregnancy hormones that enables childbirth makes your ligaments relax, including the ones between all the small bones in your feet. My feet returned to their normal size after my first pregnancy but not after my second one and my feet have ended up at least half a size bigger. Cue new cycling shoes. A simple way to check if your shoes fit is to stand on your insoles. Your toes shouldn’t be touching the end but they shouldn’t be too far off either.
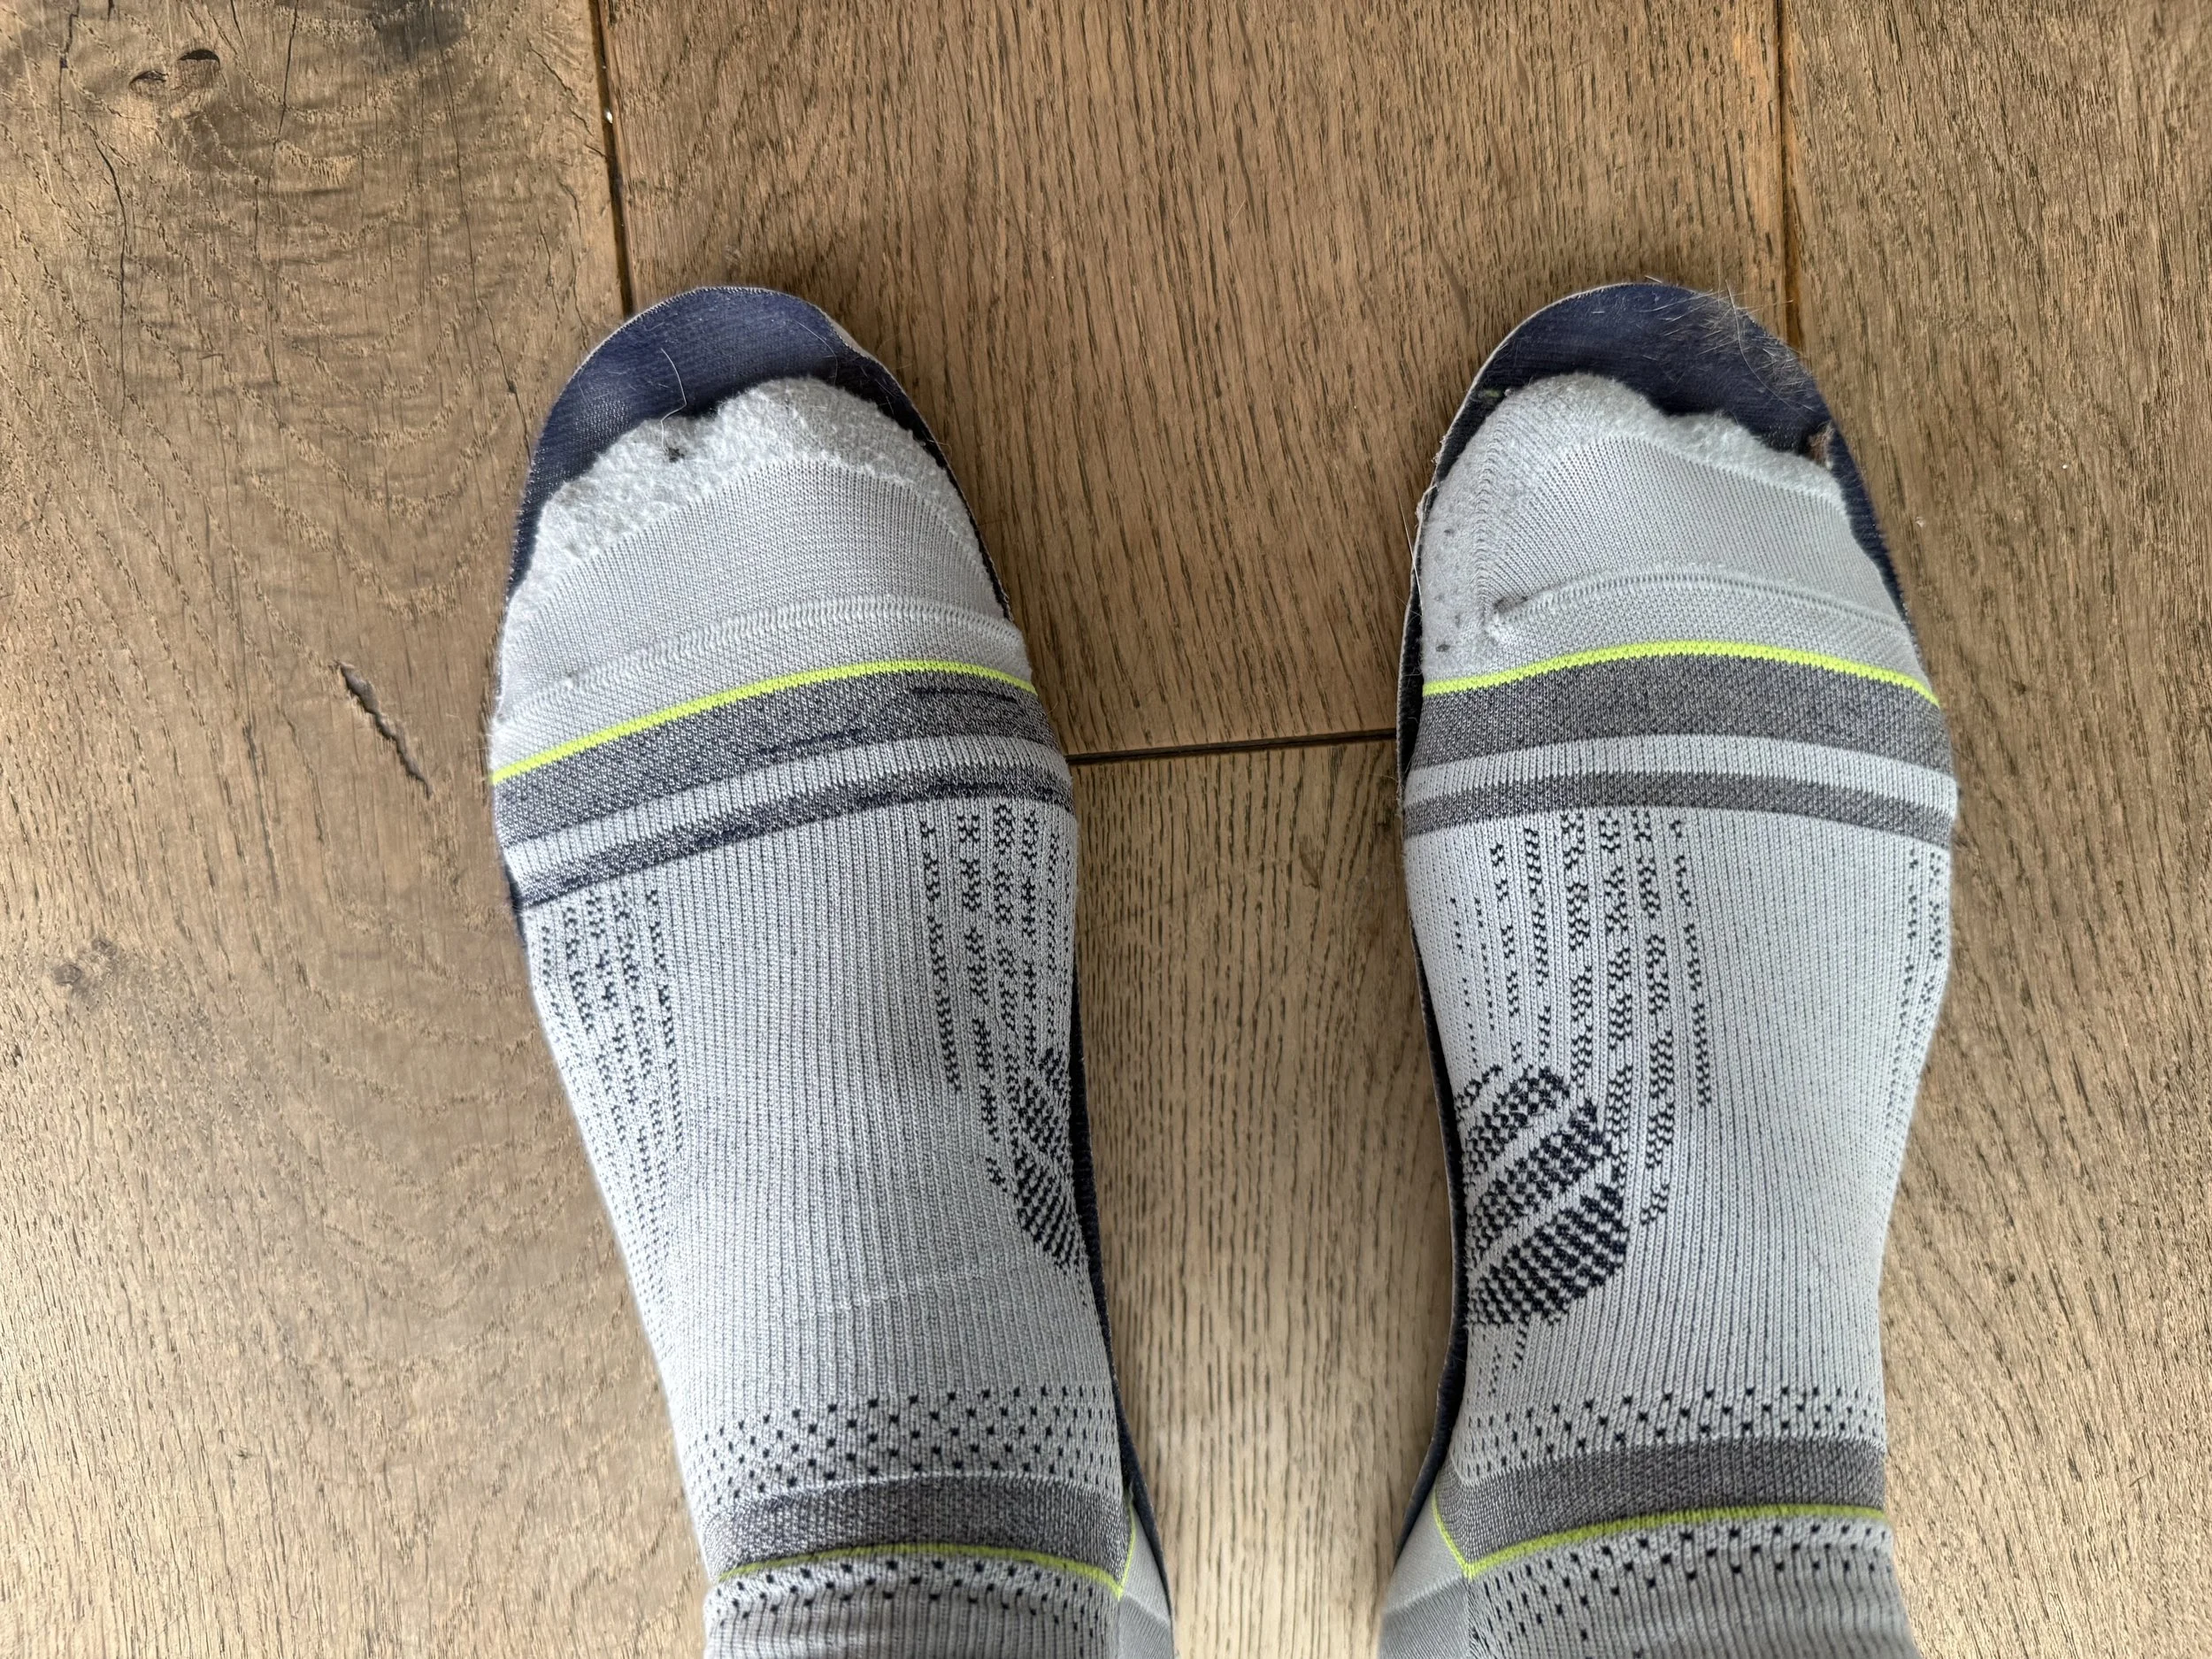
Stand on your insoles to check your shoe fit
How to Set up Cleats 1: Marking Your Foot Position
Have a feel of your feet in your shoes and locate your 1st metatarsal head. This is the knuckle at the bottom of your big toe. I place a piece of masking tape over the position and put a mark over the centre of the bone, the spot which sticks out the most
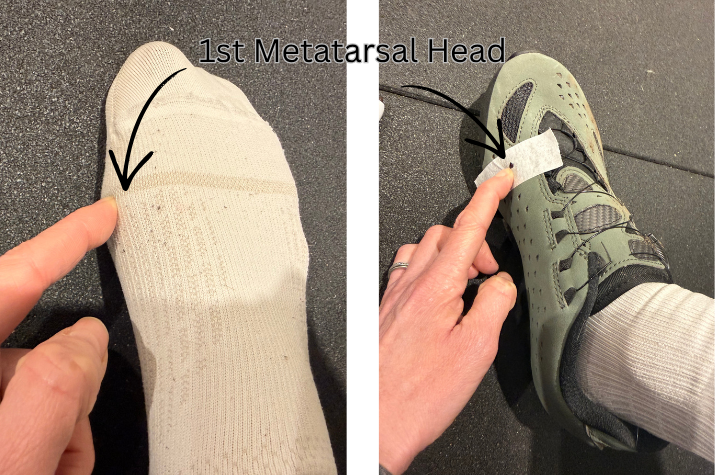
How to find your 1st metatarsal head
Step 2: Choosing Your Cleat Position
Your cleat position defines which part of your foot you’re pushing off, which affects your muscle activation. If you’re a sprinter, track cyclist or race time trials, your pedal centre will be slightly behind your 1st met head. This position increases calf activation for explosive strength, but your calf muscles tire very quickly. If you think about the body positioning of runners on the start line, the shorter the race, the lower their body at the start and the more they push off towards the front of the ball of the foot, increasing calf activation. As the race distance increases, the starting position becomes more vertical, the push comes from further back on the ball of the foot, increasing glute and hamstring activation. These are your endurance muscles, which cyclists who mainly ride for over 30 minutes need to be using.
Once you’ve got your bone position marked, take off your shoes and position them flat. If you use road cleats, place the cleat flat, then mark where this position on the base of the shoe. I use chalk pens which can be wiped off, you can also just mark this on the masking tape.
On the base of the shoe, locate the pedal centre. For Shimano SPD-SL road cleats and SPD gravel/MTB cleats, there is a small notch on the side, though you’ve got to look hard on the road ones. Look Keo have a line on the side for speedplay, the pedal centre is through the centre of the cleat.
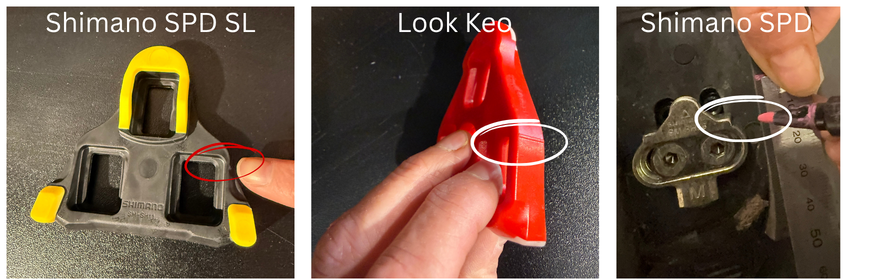
Pedal centre position
Before you move your cleats, I’d always advise to make a note of the current position, so you can see how much you’ve moved them and you’re able to return to the original position if you don’t have an improvement or even worse, develop discomfort or pain. Simply drawing on the bottom of the shoes is normally good enough. I draw around my cleats before changing them too, so I can simply put the new cleats on it exactly the same position without remeasuring.
For sprinters, I place the pedal centre around 5mm behind the 1st metatarsal head. Some people will find this can be tough on the knees, so be ready to push this position back if you experience knee discomfort.
For riders who regularly ride over 30 minutes, the pedal centre is on average 10mm behind the first metatarsal head. If you have very small or very large feet, this can be shifted forwards (small feet) or backwards (big feet) a few mm. My feet are size 5 UK, so my pedal position is around 8mm behind my 1st met head.
Triathletes often favour a position a little further back than this, averaging around 14mm. The further back the position, the more load you take off the calf muscles, which leaves then fresher for the running section of the event.
Remember that if you move the position of your cleats, you will also have changed your effective leg length, so your saddle height will need adjusting. If you’ve moved your cleats back 10mm, you’ve moved your foot forward and away from your saddle by 10mm. You’ll need to lower your saddle around the same amount, assuming you had it in the correct position in the first place.
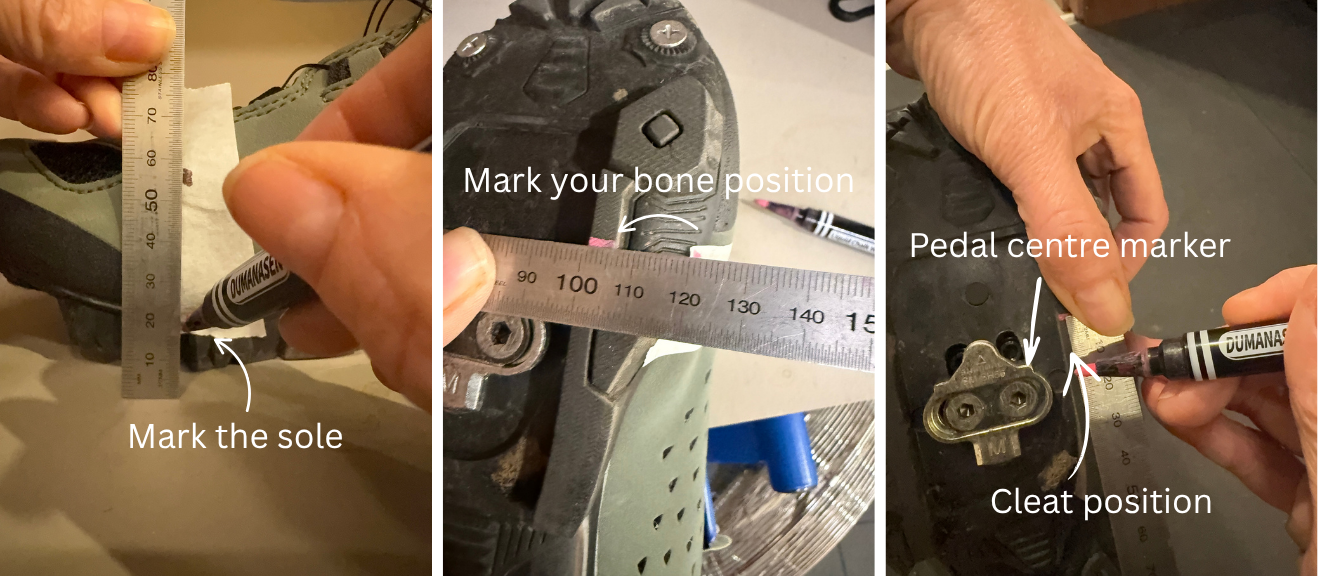
Mark where your bone is in relation to your pedal centre
Towards the end of a comprehensive bike fit or a cleat fit appointment, I also look at the cleat positioning side to side and cleat rotation, using a laser line running up the midfoot to the centre of the knee. This is something which may not be able to replicate at home, but it’s worth looking down and checking your riding position. Do you ride with your knees nearly brushing the top tube? Do you have a wider knee position at the top of the pedal stroke? If your knees naturally want to be running in a narrow position, try moving your cleats out a little, to bring your feet in and under your knees. For people with large feet, it may not be possible to move the feet in without having your heel brush the crank arm, which would be worse overall. If you are a bigger person, you may want to try moving them in a bit, to move your feet out. There are pedal spacers available Take note: Do your knees feel better after a ride with the new position compared to the previous one?
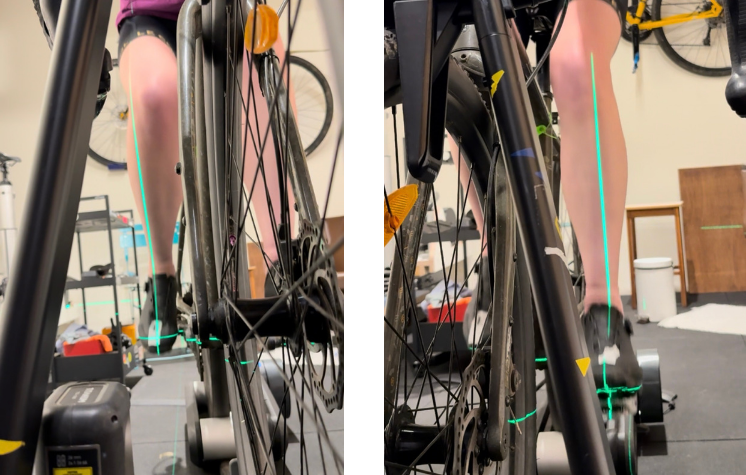
checking knee over toe position.
Why do we do this?
Pushing off the correct part of the foot, for your riding style, will improve the quality of your pedal stroke, increase activation of the correct muscle groups and can reduce pain in the foot, knee, hip or all three.
All leg muscles, upper and lower, attach at or around the knee. If your foot and knee don’t align, if you’re overusing the wrong muscles, the forces going through your knee won’t be even, your patella can be pulled to the side and this can all contribute to knee pain.
Cleat positioning should always be done with a saddle height adjustment and is most effective when shoe set up and foot activation is also included.
If you’re doing this at home, have a play, make some changes and keep notes or photos of what you’ve done. How did your power feel on the next ride? How did your muscles and joints feel after the ride? Did you notice a change? What did Strava say?
Basic cleat positioning is included with all my bike fits. Detailed cleat fitting and foot activation can be booked as a stand alone service or as part of a comprehensive bike fit. Contact me for further details or book online